A set of sensor and actuator modules for mobile robots. The modules are build using AVR ATMega microcontrollers and use a minimum of external component. The microcontrollers are programmed in C (GCC) to allow for easy modification of the code. I2C is used to communicate between the modules, the modules are interconnected with only 4 wires. The i2cMaster module can be used to control the modules via a serial interface. The actual module code and the bus interface code are split in two separate source files, it is also possible to rebuild the code for use with a different communicatio interface.
License
This project is under the GPL license, see the LICENSE.txt file for details.
Download
Click here to download OpenSense.
Available modules
| Module | Status | Description |
|---|---|---|
| I2cMaster | Works | Acts as a interface between the i2c module bus and the external serial bus. |
| Servo | Works | Actuator for up to 16 hobby servos inclusive speed control. |
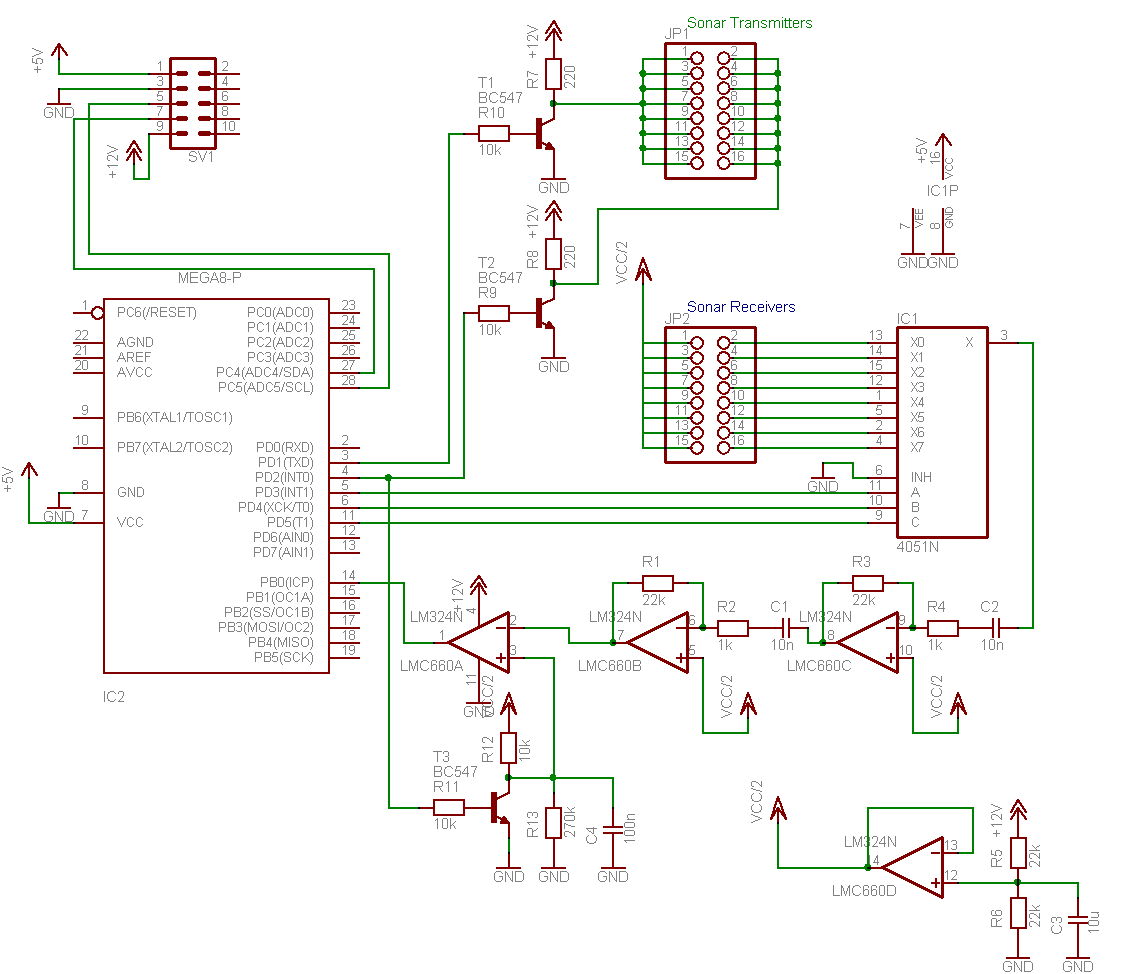
| Sonar | Works | Sonar distance sensor for up to 8 sonar units. |
| Motor | Works | Synchonized and PID speed controlled actuator for a two DC motor differential drive robot with encoders. |
| DockTx | Works | Docking station IR transmitter. |
| DockRx | Works | Docking station IR receiver. |
| RcReceiver | Works | Decodes signals from a RC-Receiver. |
| RcReceiverMaster | Works | I2c bus master, decodes RC-Receiver signals and drives DC motor and servos. Mainly for demostration purposes: it digitize the RC-Receiver servo PWM signals, sends them via i2c to the servo module which converts them back to servo PWM signals. Easier is of course to directly connect the servo to the RC-Receiver. |
| LCD | Works | Drives a character LCD display. Currently integrated in modI2cMaster, not individual i2c module yet. |
| Battery | Planned | Monitoring of discharge/charge current, voltage and Ah. |
| IrDistance | Planned | Drives up to 5 Sharp GP2D12 (10-80cm) / GP2Y0A02YK (20-150cm) / GP2D120 (4-30cm) IR distance sensors. |
| IrRemote | Planned | Receive commands from a IR remote control. |
| Radio | Planned | Receive/Transmit via low cost 433 MHz radio modules. |
Files and Directories
doc The documentation is in the ‘doc’ directory.
modXXX contain the source code and Makefile for a specific module. Run ‘make’ in a mod subdirectory to compile the source code and program the microcontroller.
lib contains shared libraries. The libraries are the actual workhorses of the modules, each module is actually a i2c wrapper around the library code. It’s is therefor possible to combine several libraries into a single module, as long as the libraries don’t exclusively use the same resources such as timers or interrupts. For example the i2cMaster module includes the lcd.c library to implement a lcd driver as well.
vb_HexTerm Contains a terminal program written in VB6 to communicate with i2cMaster. Functioning but needs some cleanup work. In the send box type ‘s’ and hit enter to scan the i2c bus. Note: all input is decimal, so ‘r 170 10 4′ reads 4 bytes from slave AA (=170) command 0A (=10).
Software and Hardware Setup
| Wire | Par-Port Pin | ATMega Signal | AtMega8 (DIP) Pin | AtMega16 and 32 (DIP) Pin |
|---|---|---|---|---|
| 1 | 25 | Grd | 8 | 11 |
| 2 | 8 | SCK | 19 | 8 |
| 3 | 4 | MISO | 18 | 7 |
| 4 | 7 | MOSI | 17 | 6 |
| 5 | 10 | /Reset | 1 | 9 |
| connect 2 to 12 | ||||
| connect 3 to 11 |
Why AVR ATMega?
Programming Style
The programs are designed for small devices, usually 8k flash. I tried both to keep the number of files to a minimum and the Makefiles as uniform and simple as possible. I opted to directly include the library c files in the code usually without using header files. Precompiler #define directives and macros are used to steer the properties of the individual modules. Read the library source file to get a list of the available options. All functions, macros and defines in a library are prefixed with a 3-5 character prefix followed by an underscore. For example all mot_XXX functions are in the motor.c library.
I2C interface
One address (0xFF) has been reserved for default functionalty in each module:
| I2C Command | Description |
|---|---|
| r ff 00 00 | Get 16 char device string (shortcut= r ff) |
| r ff 01 00 | Get 2 byte twipq library verson (major,minor) (shortcut=r ff 01) |
| w ff 02 00 <newsla> | Set slave i2c address to newsla |
| r ff 02 01 | Get interrupts status : 1=send interrupts to busmaster, 0=disable interrupts |
| w ff 02 01 <0|1> | Set interrupts status : 1=send interrupts to busmaster, 0=disable interrupts |
| r ff 02 02 | Get i2c speed as multiple of 10kbaud |
| w ff 02 02 <speed> | set i2c speed as multiple of 10kbaud |
| r ff 03 <adr> | Read user eeprom, see module documentation for details. |
| w ff 03 <adr> <val> | Write user eeprom, see module documentation for details. |
| w ff 04 | Reset device (required after changed in configuration) |
| w ff 05 | Clear eeprom + reset + load defaults |
